Many times when you work for someone, they already have their own vulnerability scanning throughout the organization. What usually happens is that onboarding to that tooling might take time, that’s why I initially started to look on OCI Vulnerability Scanning Service – to have something scanning your servers or images from day 1!
Or could be that there isn’t any existing tool so you definitely will need something. OCI Vulnerability Scanning is completely free and supports hosts and container images as scanning targets which are created from platform images.
It checks for known vulnerabilities on OS configuration or packages, any critical open ports as well as CIS benchmarks. Documentation has these outlined, go and check more details from there.
Let’s take a look!
Initial setup
We’ll do the initial setup in phases, first we need to setup some policies. I’m going to use Administrator group myself to view everything so you won’t need additional policies in this case for group, if you’d need them, they are on above link defined.
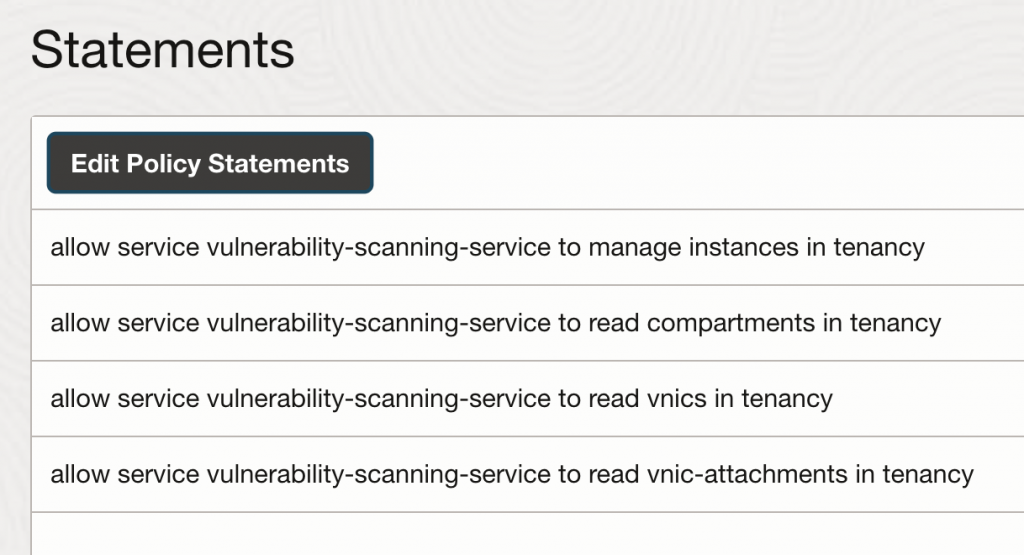
Policies for VSS service:
Allow service vulnerability-scanning-service to manage instances in tenancy
Allow service vulnerability-scanning-service to read compartments in tenancy
Allow service vulnerability-scanning-service to read vnics in tenancy
Allow service vulnerability-scanning-service to read vnic-attachments in tenancy
Now that I have policies, I’ll navigate to Scanning Service and select Scan Recipes from the left side, I’ll create MyComputes Scan Recipe which I’ll use to scan any vulnerabilities in my target computes.
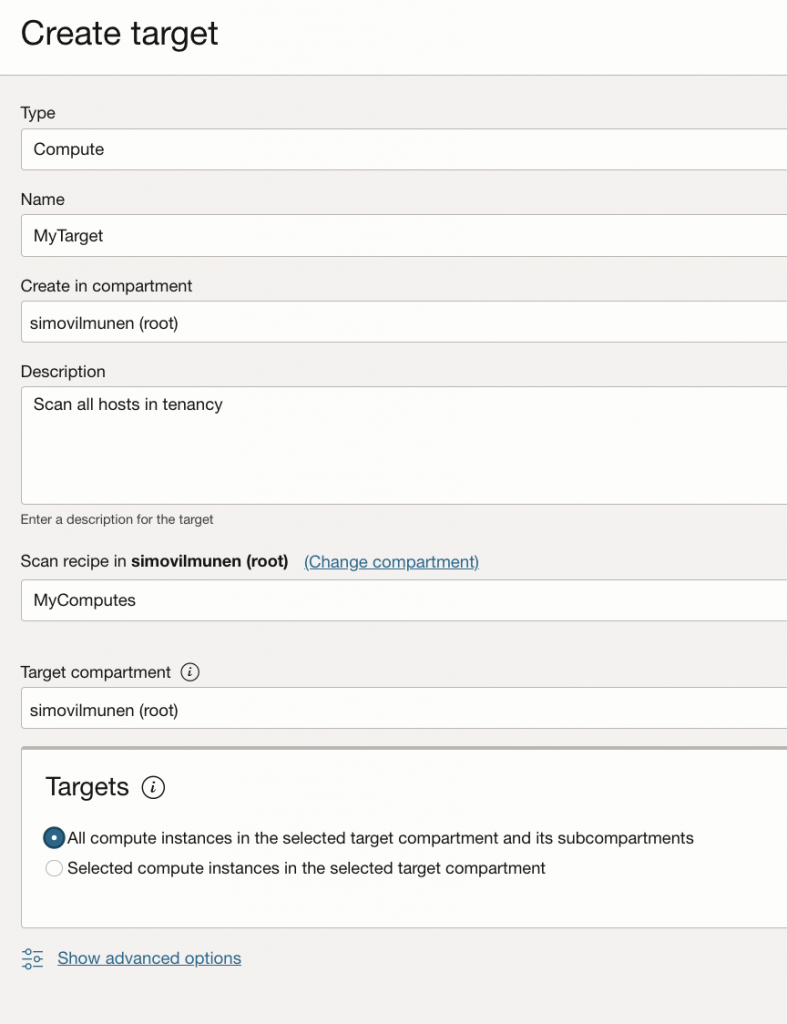
I’ll need Service Gateway in my VCN and routing from each subnet towards SGW, otherwise I can’t scan my private computes.
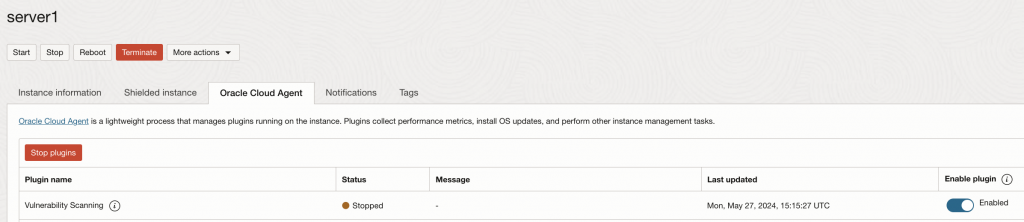
What else? I’ll need to go to my compute instance, check the agents tab and validate I have vulnerability scanning plugin enabled.
Results
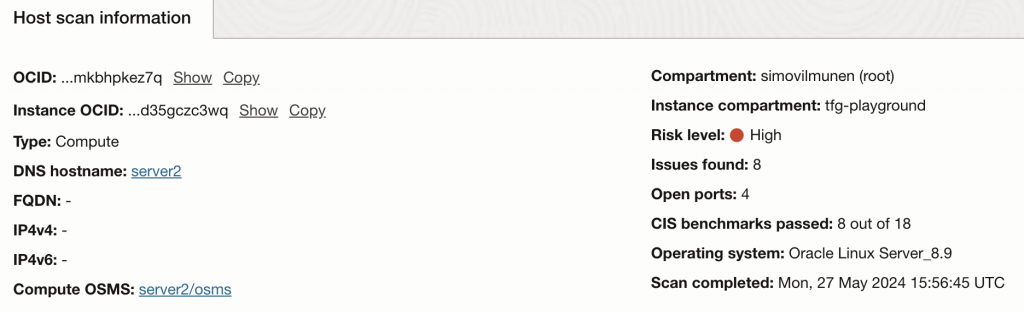
After some minutes, I now have recipe defined, targets defined and plugin enabled – results will appear under Scanning Reports.

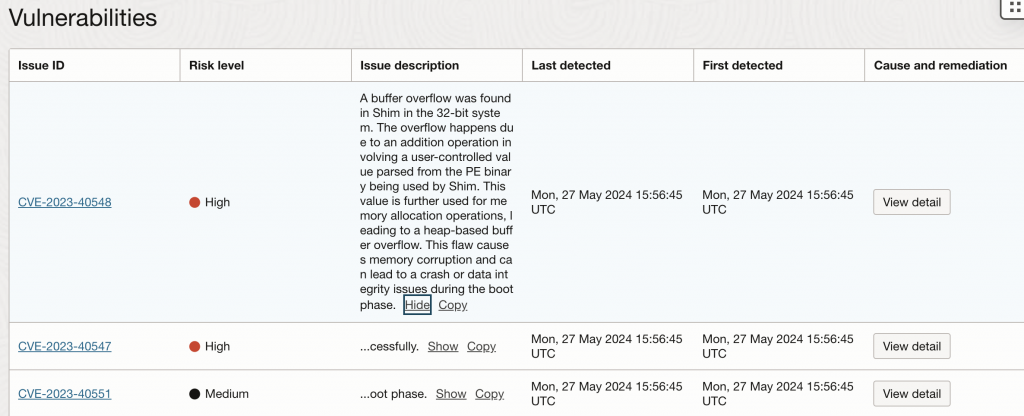
You can see from above screenshot I have eight issues on server2 and two on server1. Since server2 is on higher risk level, let’s drill down onto it.
I can see host details for scans first on top, and then from the left side I can see Metrics, Open Ports, Vulnerabilities and CIS benchmarks.
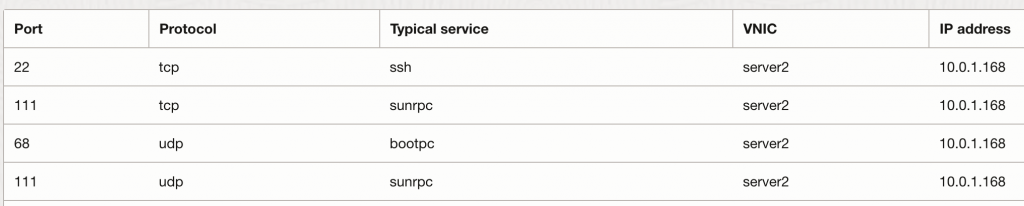
Skipping metrics I’ll check Open Ports first:
Now looking on vulnerabilities it’ll show me the CVE, Risk Level, Issue Description etc. You can also click on view detail to see cause and CVE remediation (which in many cases is to update the package to latest).
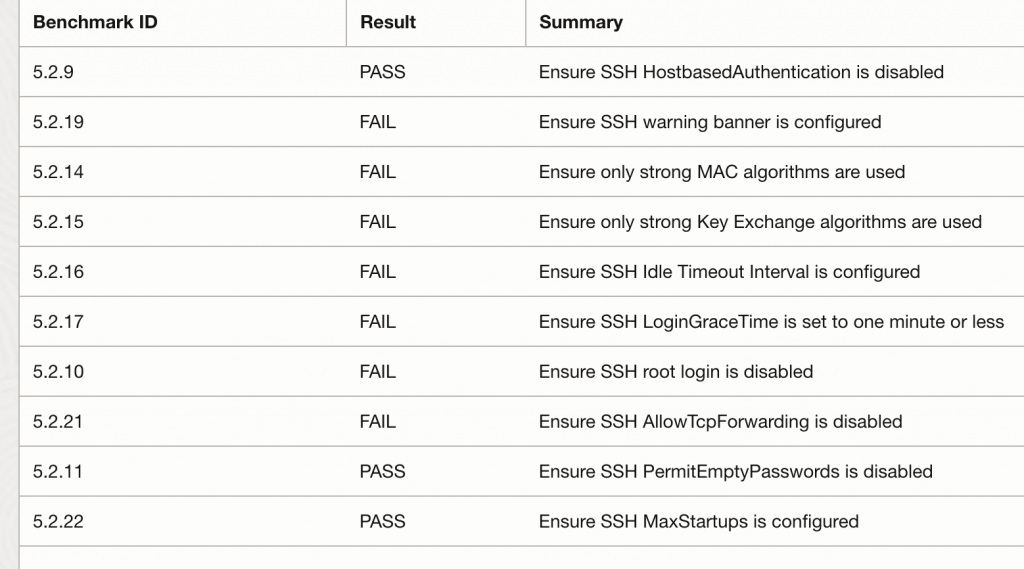
I do like the CIS benchmarks a lot, you can monitor your servers and see if they would pass the related CIS benchmarks. Maybe you have some compliance requirements and some of these would be relevant so you want to make sure you always implement the benchmarks against your VM?
With most of my projects, we end up setting majority of these so we’re within compliance.
Summary
Whether you already have an existing vulnerability scanning or not, take a look on OCI Vulnerability Scanning! It provides you a quick way to enable scanning and monitoring for your instances (and images!) from day 1. Think about enabling some monitoring posture right away.
You can also automate your OS patching to get rid of the alerts which we’ll take a look next!
Does OCI have anti virus / malware scanners for the files loaded in the buckets?
Not really Radu, you’d have to setup something like this yourself: https://docs.oracle.com/en/solutions/anti-virus/index.html#GUID-47DB14DB-6A6C-4726-B9AB-A5CF71FE143F